- Who this is for: High-volume creators, daily vloggers, educators, and anyone who produces tutorials, screen-shares, or talking-head content.
- What you need: A dedicated workspace, mounting arms or clamps, a high-quality surge protector, and dummy batteries (AC power adapters) for your cameras.
- How long this takes: One weekend to design, purchase, and build; daily operational benefits thereafter.
The Always Ready system is the architectural design of a creator's workspace so that all technical components are permanently fixed in their optimal positions. It treats your filming environment not as a temporary configuration, but as a permanent, zero-friction workstation.
| Component | Traditional Setup | Always Ready Setup |
|---|---|---|
| Power | Plugged in individually per session | Single master switch for the entire studio |
| Mounting | Tripods and light stands on the floor | Desk-clamped arms and wall mounts |
| Format Switching | Rebuilding the set for each shot | Unified desk architecture for multiple formats |
The core rule is: the distance between having an idea and pressing record must be measured in seconds, not minutes.
The greatest enemy of consistency is friction. Willpower is a finite resource. When you rely on willpower to overcome the logistical hurdles of setting up your gear, you deplete the creative energy needed to actually perform on camera. By eliminating the setup process, you preserve your mental bandwidth for scripting, delivery, and connection.
"An 'always ready' space is essential to keeping your home studio productive, and make the most with your time. Worry less about setup and keep the content flowing."
Furthermore, an Always Ready setup guarantees technical consistency. You never have to worry about whether the lighting matches your previous video or if the audio levels are correct, because the variables never change. This allows you to produce higher quality content at a significantly faster rate. This is an architectural project with daily operational benefits, not a situational tactic.
Nate's Film Tutorials built his entire 650K-subscriber YouTube studio on a single FlexiSpot sit-stand desk. He uses a series of Tarion clamp-mounted arms to hold his main camera, an overhead camera, and his lighting. Because everything is attached to the desk, he can raise or lower the entire studio with one button, and switch from a talking-head shot to an overhead B-roll shot instantly.
Similarly, Home Studio Pro advocates for the "Always Ready" philosophy by ensuring that all gear is plugged into a single power strip. When it is time to record, one switch turns on the key light, the practical background lights, and the camera monitor simultaneously.
An Always Ready workspace feels clean and intentional. There are no tripods taking up floor space; everything is mounted to the desk or the walls. Cables are routed invisibly through trays and tied down, preventing the psychological clutter of a messy environment.
| Incorrect Approach | The Framework Approach |
|---|---|
| Recharging camera batteries before every shoot | Cameras plugged into wall power via dummy batteries |
| Adjusting light stand height and angle for every video | Key light clamped to the desk or wall, permanently dialed in |
| Clearing non-filming clutter off the desk to shoot B-roll | A designated, permanent zone specifically for B-roll |
When you sit down, the camera is already framed perfectly on your face, the microphone is positioned just out of shot, and the lighting is balanced. You can transition from answering emails to recording a high-quality video in less than thirty seconds, simply by turning on the power and hitting record.
The One-Switch Power Protocol
If you have to plug in your camera, turn on your key light, and boot up your monitor separately, you still have too much friction. Your entire studio should power up simultaneously. By consolidating your power sources, you eliminate the mental checklist required to start filming.
Do this now:
- Route the power cables for your key light, fill light, and background practical lights to a single, high-quality surge protector.
- Plug your camera into a dummy battery (AC power adapter) and route that to the same surge protector.
- Plug your external camera monitor into the same power source.
- Mount the surge protector under your desk using heavy-duty double-sided tape or a cable management tray.
- Ensure the surge protector has an easily accessible master switch.
- Test the system: flip the master switch and verify that your entire studio comes to life instantly.
The Floor-Clearance Mounting System
Tripods and light stands eat up valuable floor space, create tripping hazards, and are easily bumped out of position, ruining your framing. You must move your gear off the floor. Clamping your gear to your desk or mounting it to the wall ensures that your setup remains stable and consistent over time.
Do this now:
- Purchase heavy-duty desk clamp mounts or wall mounts for your primary camera.
- Mount your key light to a desk-clamped light stand or a wall-mounted boom arm.
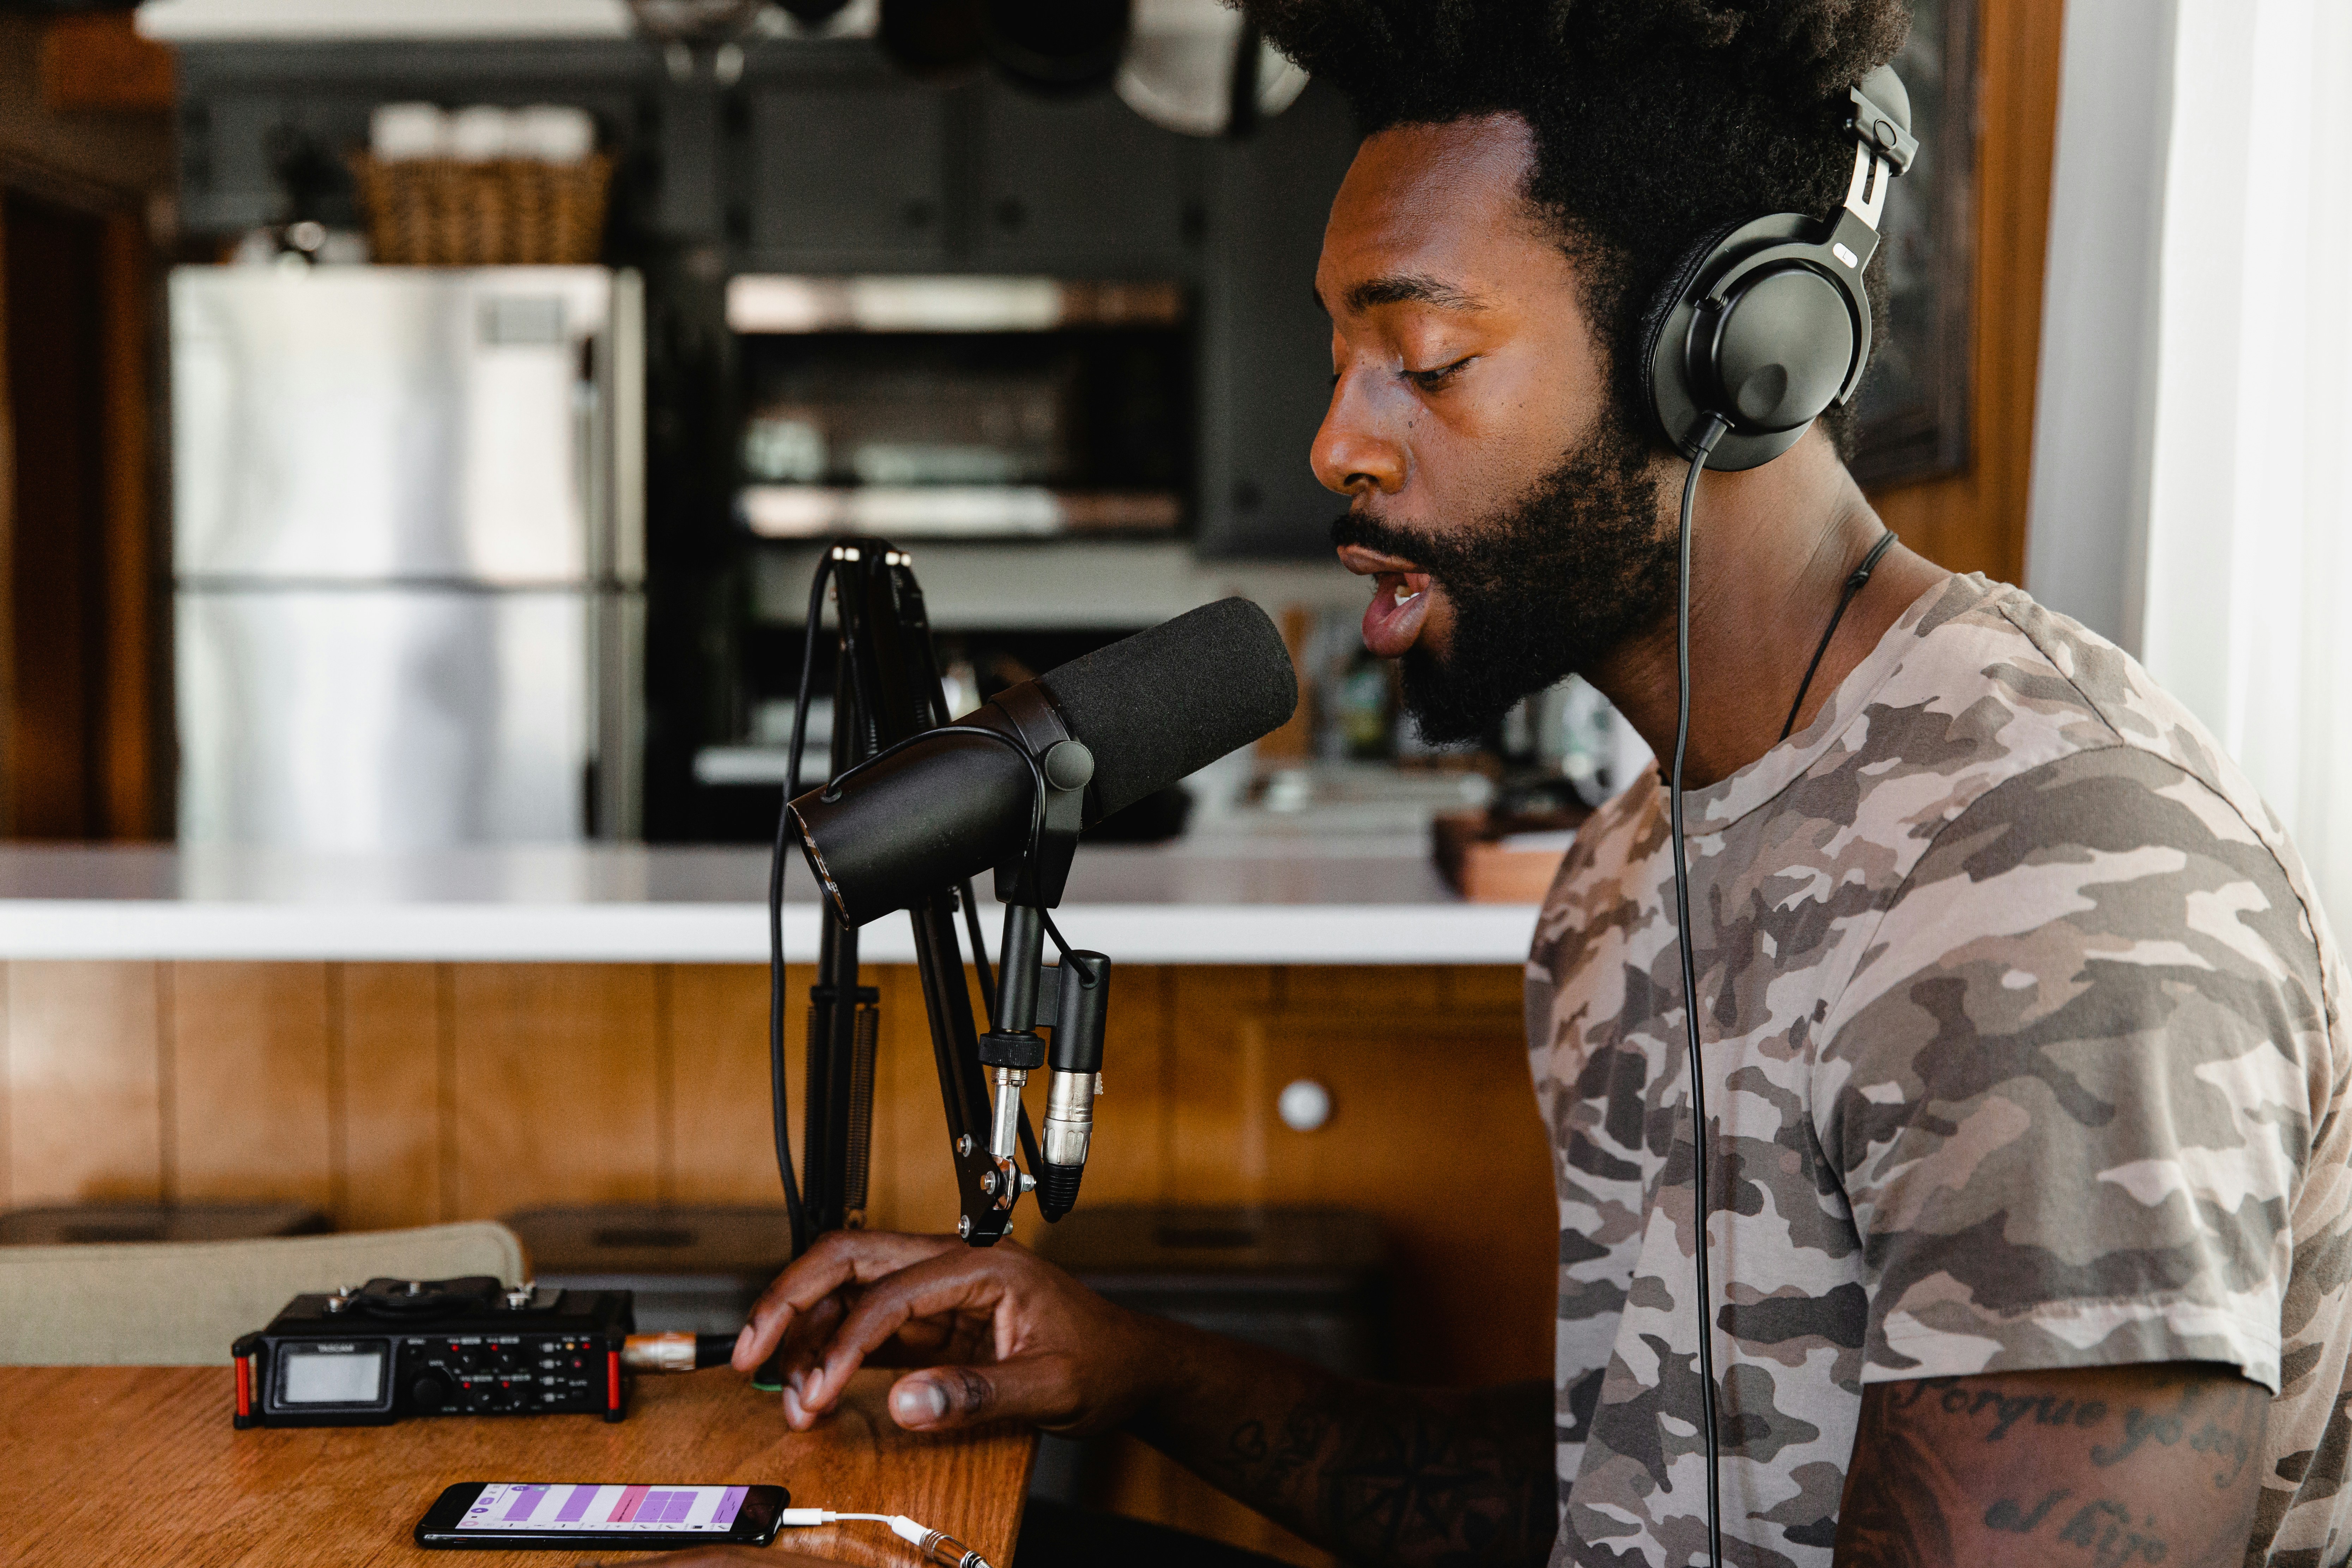
- Use a low-profile boom arm for your microphone and clamp it to the back edge of your desk.
- Secure all cables to the arms using velcro ties so they move cleanly with the equipment.
- Once the camera and lights are perfectly positioned, tighten all joints securely so they cannot drift over time.
- Mark the exact position of your chair on the floor with small pieces of tape to ensure you are always in the correct focal plane.
The Unified Desk Architecture
If you film multiple types of content, such as talking head and overhead tutorials, you should not have to rebuild your set for each shot. Design your desk to accommodate all formats simultaneously. This allows you to capture A-roll and B-roll in a single session without losing momentum.
Do this now:
- Position your main camera to capture your talking-head shot while you are seated naturally at your desk.
- Install a secondary overhead camera arm clamped to the side of the desk, permanently pointing down at your workspace.
- Clear a designated, permanent zone on your desk specifically for shooting B-roll or product demonstrations.
- Ensure your key light is positioned high enough and angled so that it illuminates both your face for A-roll and your desk surface for B-roll.
- Route the HDMI cables from both cameras to a switcher or directly to your computer so you can change inputs without unplugging anything.
- If using a sit-stand desk, verify that all cables have enough slack to accommodate the desk at its maximum height without pulling on the gear.
The Battery Dependency Trap The creator relies on rechargeable batteries for their camera, lights, or microphone. They sit down to record, discover a dead battery, and the momentum of the session is instantly destroyed while they wait for gear to charge. If this has already happened: Purchase a dummy battery (AC power adapter) for your specific camera model immediately. Plug your lights directly into the wall. Remove batteries from the equation entirely for your home studio.
The Drifting Framing The creator uses cheap, flimsy desk mounts or fails to tighten the joints securely. Over the course of a week, the camera slowly droops, or the light gets bumped, resulting in inconsistent framing and lighting across different videos. If this has already happened: Re-frame your shot perfectly. Take a reference photo of what the frame should look like. Use a wrench or pliers to aggressively tighten the joints on your mounting arms so they require significant force to move.
The Multi-Use Clutter The creator uses their filming desk for messy, non-filming projects (like crafting, eating, or unboxing packages) and fails to clear it. When it is time to film, the desk is covered in clutter, reintroducing the exact friction the system was designed to eliminate. If this has already happened: Implement a strict "reset to zero" policy. At the end of every workday, clear the desk completely. The workspace must be pristine and ready for the camera before you are allowed to go to sleep.
The Always Ready system is a one-time architectural project with daily operational benefits. You will spend one weekend designing, purchasing, and building the setup. Once it is locked in, you will use the system every single time you sit down to create content. It transforms video production from a logistical event into a seamless daily habit, compounding your output over time.
This framework works across all niches, but it is especially critical for high-volume creators, daily vloggers, educators, and anyone who produces tutorials, screen-shares, or talking-head content. It is particularly essential for creators who balance YouTube with a full-time job or running a business, as they cannot afford to waste their limited creative windows on technical setup.